

Fixing damaged wooden skirting boards or furniture edges is usually fairly easy: You clean and sand off a bit the surrounding area, apply wood filler, let it try, sand it and paint it.
But what if it isn’t a straight edge corner? What if your object to repair has a bullnose, a chamfered or even ogee or torus edge? This post will tackle this issue.
Before going further: This can also be applied to various other materials as well! So if you need to repair for example something with plaster (clay), or when fixing a car surface with metal putty, this post might help. With filling material like silicone or acryl, it will be difficult to shape larger areas.
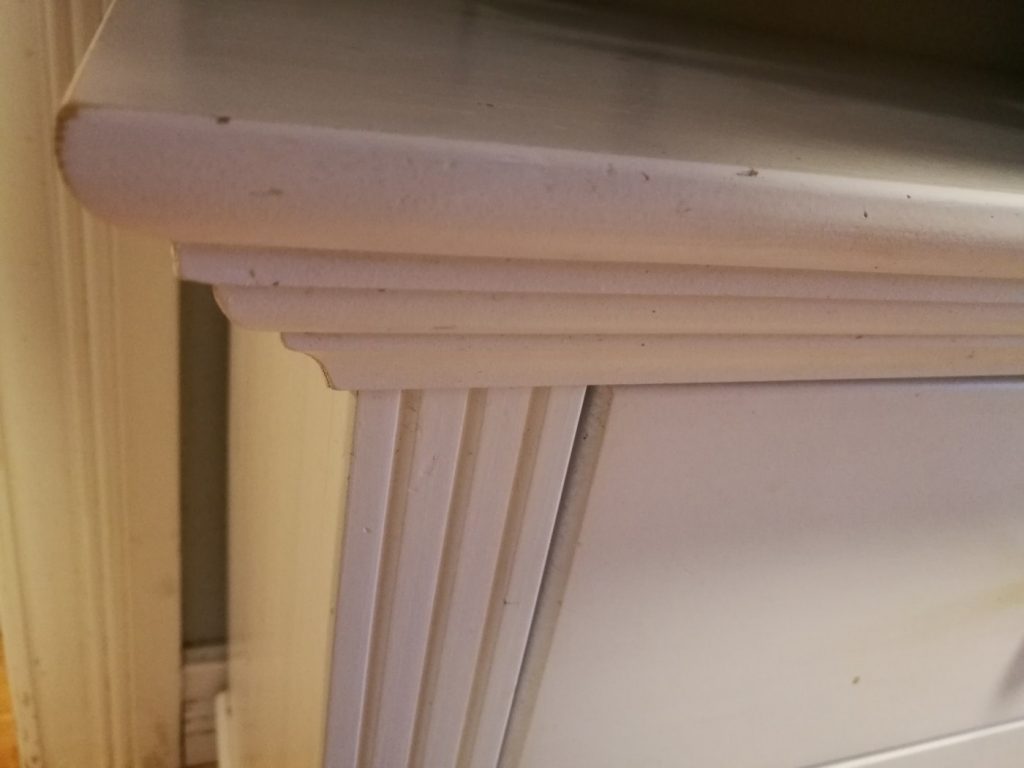
In modern houses and furniture, edges are usually nearly squared. But most likely you will have some furniture that has these beautiful, detailed edges. These are created by using a router and router bits. Most common are softened round or round-over edges (bullnose), 45 degrees edges (chamfered) and detailed (ogee or beading) edges.
The problem
So let’s say you’ve just moved to a new place. And a piece of furniture’s detailed edge got chipped (and you can’t find the missing piece to glue back on). Or you have a puppy and it chewed on a skirting board. Maybe you’ve dropped something hard on the edge of a wooden table or bumped something against a detailed closet corner. How to fix those?
Important note on antiques:
If you have never done a restoration before, and the object is very valuable and/or old, I strongly recommend, that you read up first more on how to restore older furniture using dedicated expert literature. Certain wood needs certain filler! And the wrong filler can even damage the wood.
Furthermore, if you work on old metal or wood, be aware that certain paints can CONTAIN LEAD, which is highly toxic and can cause severe damage to your body’s nervous system. So if it is an old piece you are working on, and you remove the paint, you should first test the paint for
The essential tools for fixing damaged detailed wooden skirting boards or furniture edges
1.) A profile gauge
The profile gauge, also known as contour gauge, is simply put a bunch of metal or plastic teeth (pins) that are lined out next to each other and held together by a vertical frame. It can replicate the shape of an object, by pressing it against that object’s face. This can be then used to create a template.
Side note: There are usually two types of profile gauges: Fine-detailed one (made out of metal) for scenarios mentioned above. And the plastic option for not so detailed jobs. The latter I used for tasks such as laying floorboards or tiles around pipes or to trace uneven wall surfaces, just like the garden house project and the floor renovation project I’ve mentioned on the welcome page.
2.) Stainless steel putty knife and square scraper
It’s good to have both: A putty knife is good to apply and rough shape the filling material. And the square scraper is good to trace and level the contours vertically up and downwards.
3.) Sandpaper
To remove existing paint or finishes around the damaged area and to smoothen later on the dried filler mass you will need sandpaper.
4.) Filling material & paint or finishing material
Duh! Here in this project example, I use of course wood filler and indoor wood paint. But depending on what you do, you might need also other things such as primers.
Other things you’ll need
A moist and a dry towel or kitchen paper, newspaper, painting tape, vacuum cleaner.
Method
Please note that is the first time that I used the profile gauge fixing damaged wooden skirting boards. So you could see that as an experiment. Another step in my path of becoming a woodworker.
An easy way would have been just replacing them with new skirting boards. But after searching for weeks trying to find a matching shape, I came to the conclusion, that these are not anymore in production. Also, I would have had to remove them in various rooms or replace them in the entire house if I install new ones. This would have been more expensive and time-consuming.
There are multiple boards damaged, but buying the fine detail gauge, filling material, 250ml paint (as well as brushes, sanding paper, masking tape, and scapers, which I can re-use.), it is still the more cost-effective method then replacing the damaged wooden skirting boards.
Preparation: Cleaning
- Remove any dust or dirt with a vacuum cleaner from the damaged area. Then clean the surface of the material with a moist towel and dry it.
- Roughen or remove the paint of the surrounding area with sandpaper to help the filling material to stick to the material. I used in this example 80 grit sandpaper. Depending on what is your object you might want to go with finer sandpaper ( 100-150 grit or even higher). Of course, be careful not to remove any details (shape/contour) of the undamaged surface!
- Make sure that no splitters or other objects sticking out over the intended shape.
- Remove all dust and dirt again with a vacuum cleaner and a moist towel.
Replicating the shape
So here is how I did it: (Please give suggestions, how you would have done it better)
- I used the
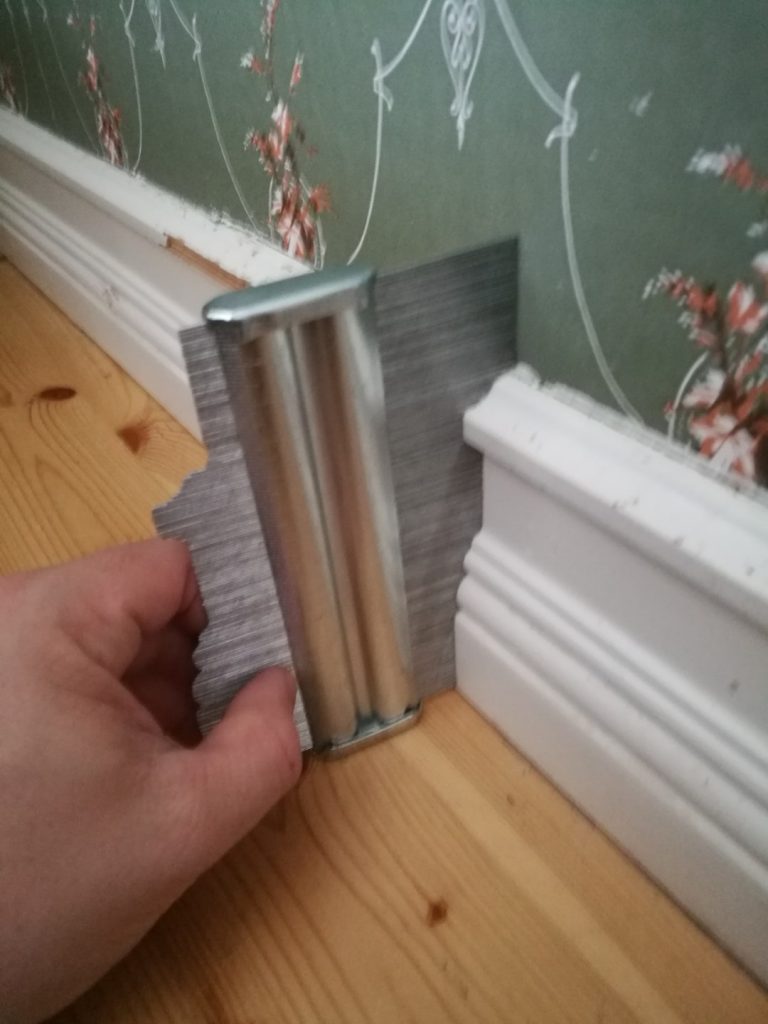
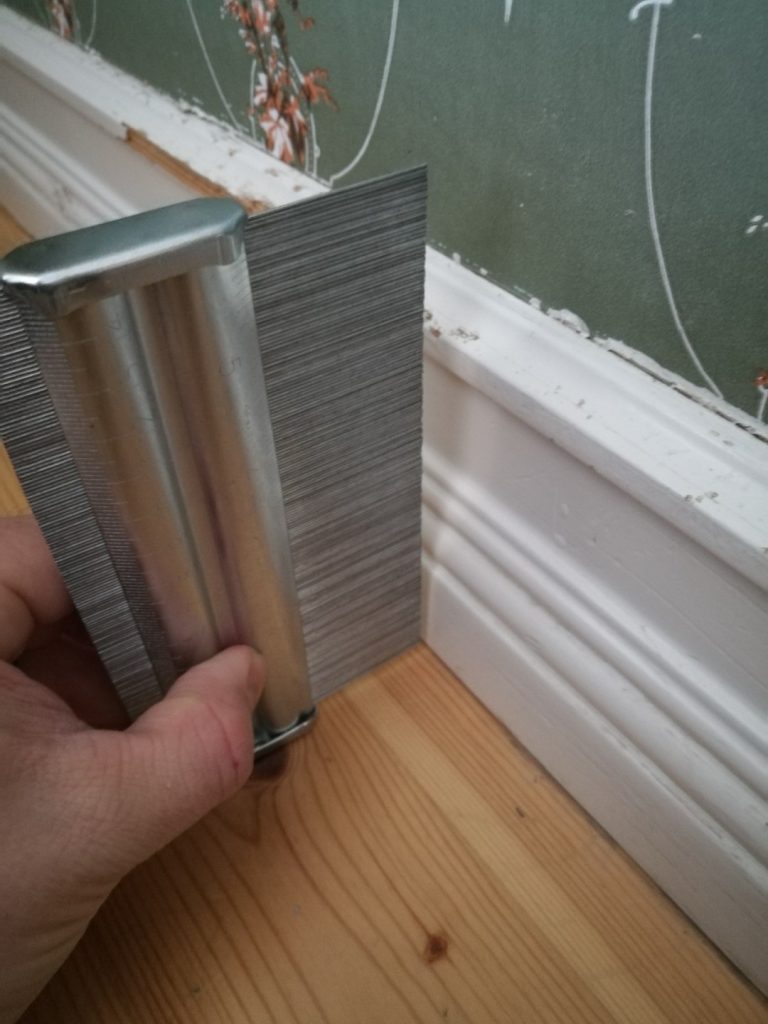
fine detailed gauge for this project. First I made sure that the profile gauge’s teeth (or pins) are all on the same height. Also, I positioned the clamping part so that it is over half of the length of the teeth (/pins) opposite to the board I want to duplicate. You can see pictures below for this. - Next, I placed the gauge with the teeth 90 degrees to the board near the damaged area and pushed it carefully onto the surface. You can see the damaged area behind the gauge in the first two pictures. Important here is to try to keep those teeth at a 90 degrees angle and that they don’t twist or bend out of their parallel position! Also: If you are working a very sensitive material/finish, I would tape off the area to profile with a none sticking tape, so you don’t push the metal teeth through the paint, the finish or the material. This could otherwise leave marks which you will need to fill and fix as well!
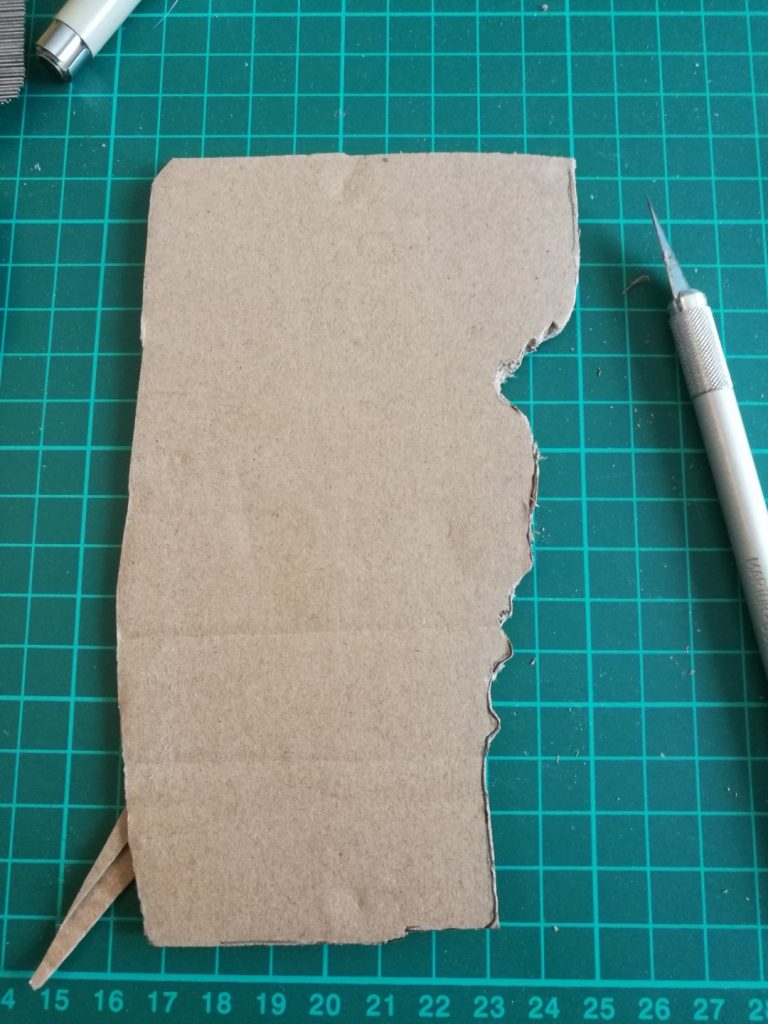
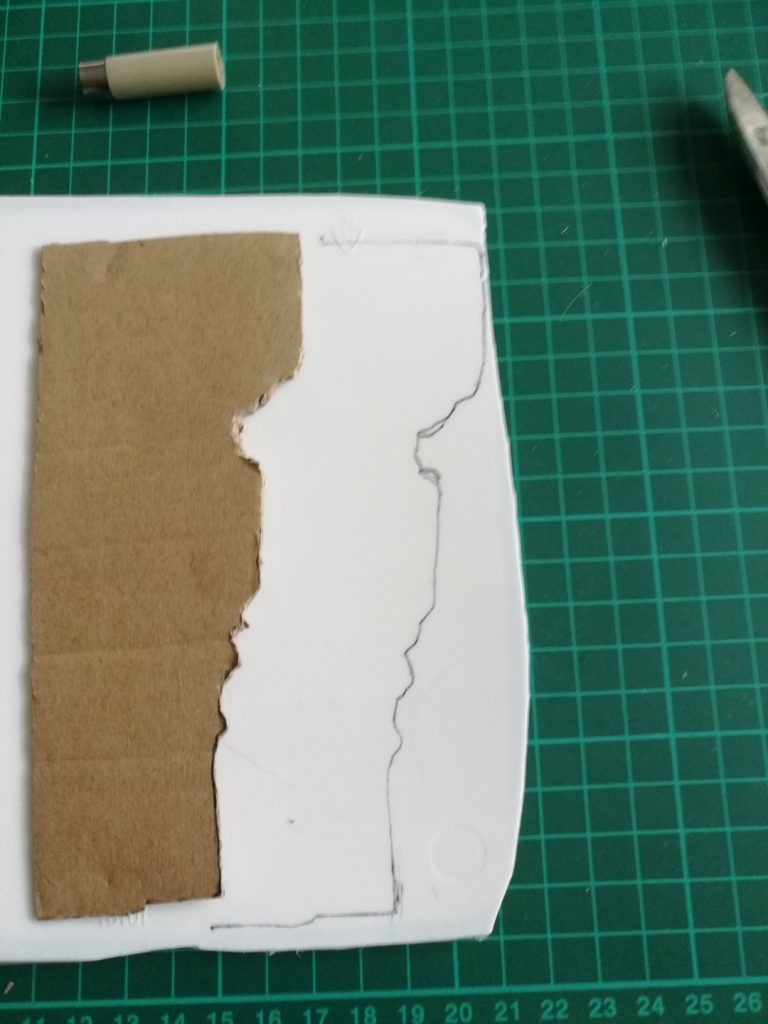
- Then I transferred the profile to a piece of cardboard. Here you have to be sure to use a very thin pen tracing the details. And that you don’t push the teeth (pins) while doing so. I made that mistake in the beginning and had to go back to trace it.
- After that, I’ve tested the cardboard template on the skirting board. To my surprise, it WAS NOT a perfect match. I had to adjust it several times: Making details more precise.
Ready for action. And one hiccup.
Once I was satisfied with the results, I copied it onto a 3mm hard plastic piece from a box. Or should I say, I
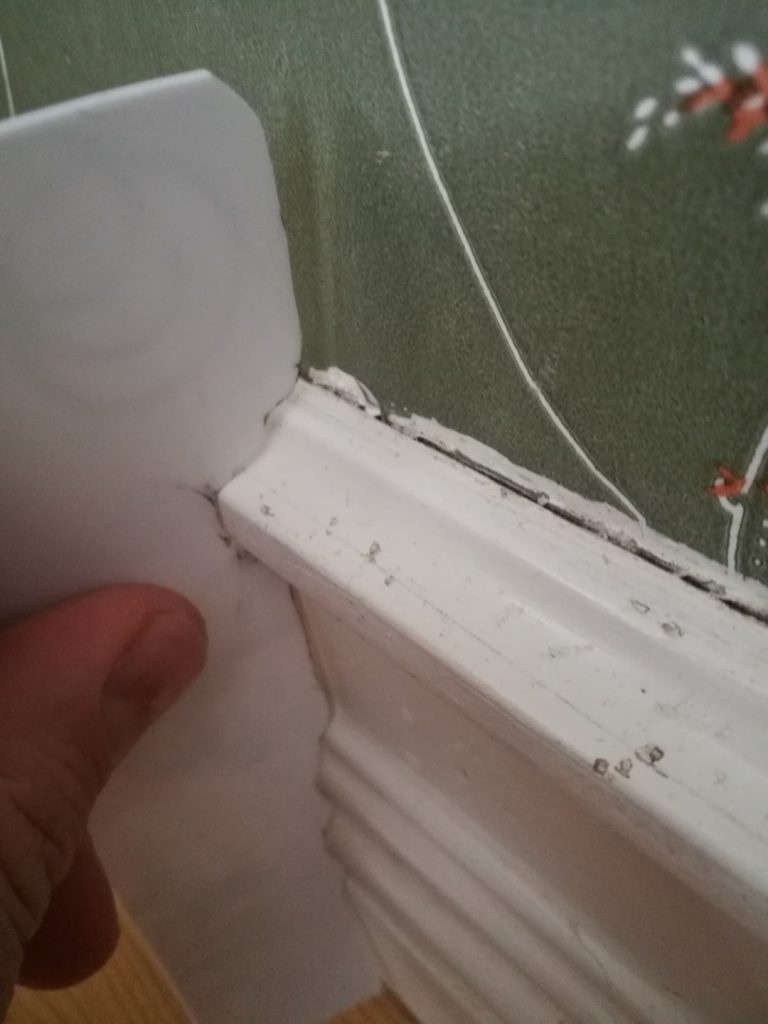
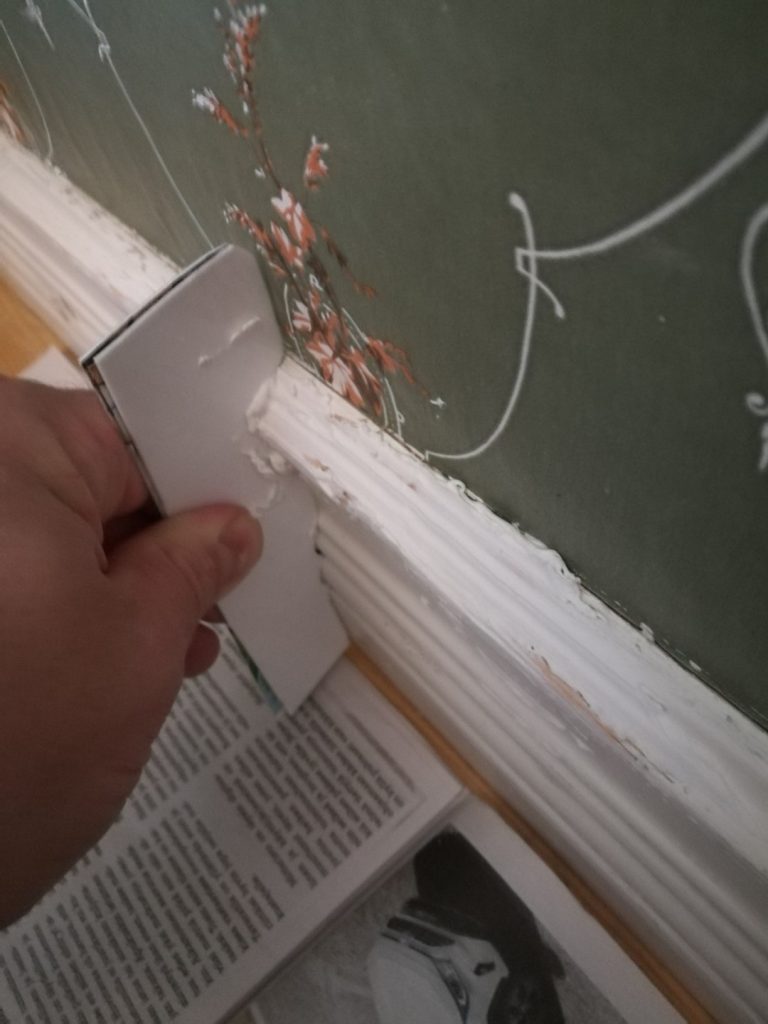
Profile gauge template in action
Next, I applied some wood filling to the damaged area and the surrounding area, shaping it into the rough outline of the profile with the putty knife. With the template I swiped the access filling off vertically several times. Cleaning it with a towel in between run. Then I used square scraper carefully level it also horizontally.
Repeat and rinse
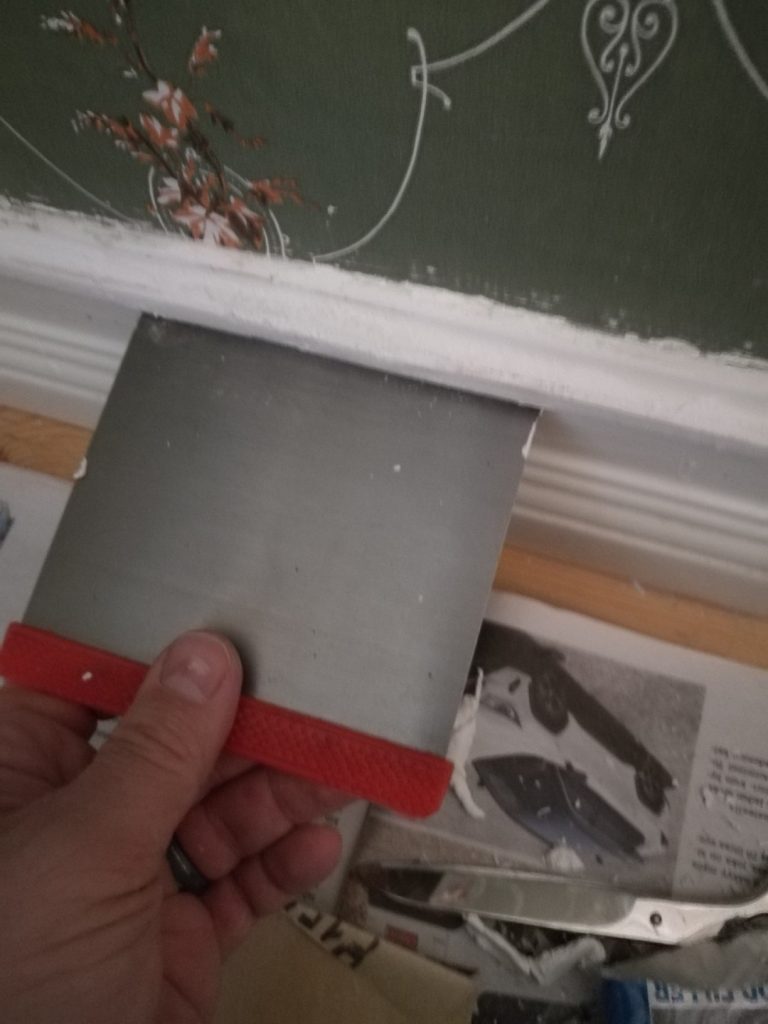
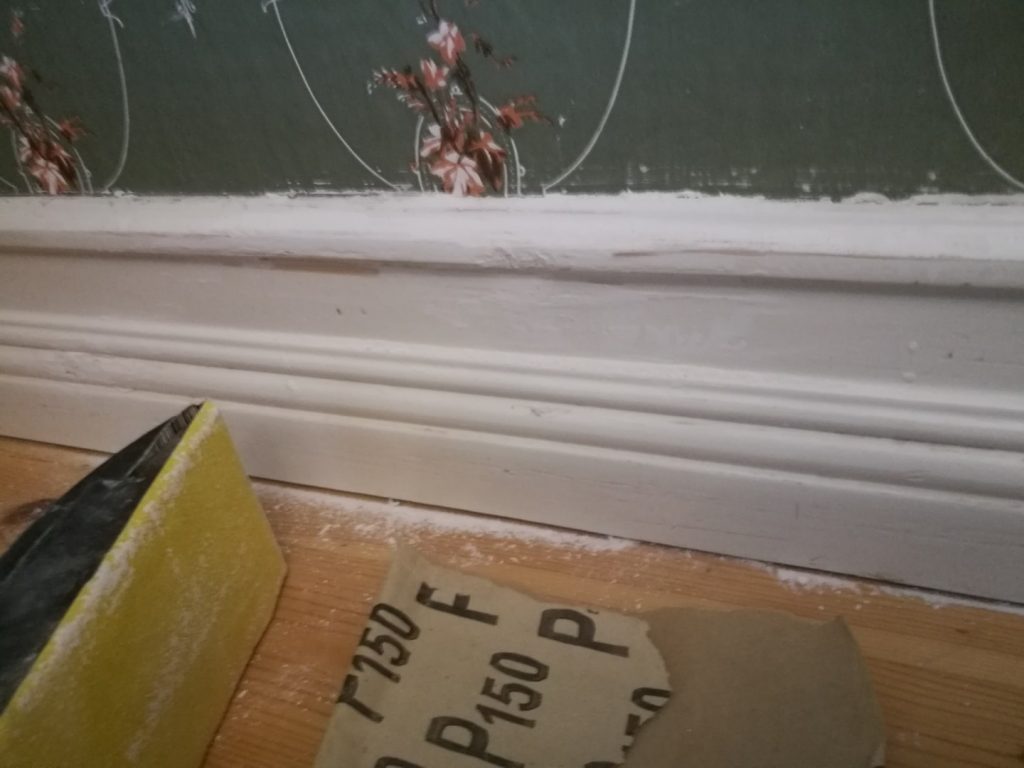
Then I let it dry for several hours and carefully sanded it off with 150 grit sandpaper.
Side tip: To improve the accuracy of the details, I used the putty knife’s edge wrapped in sandpaper. After that I swiped it with a towel and vacuum cleaned it, I repeated the process.
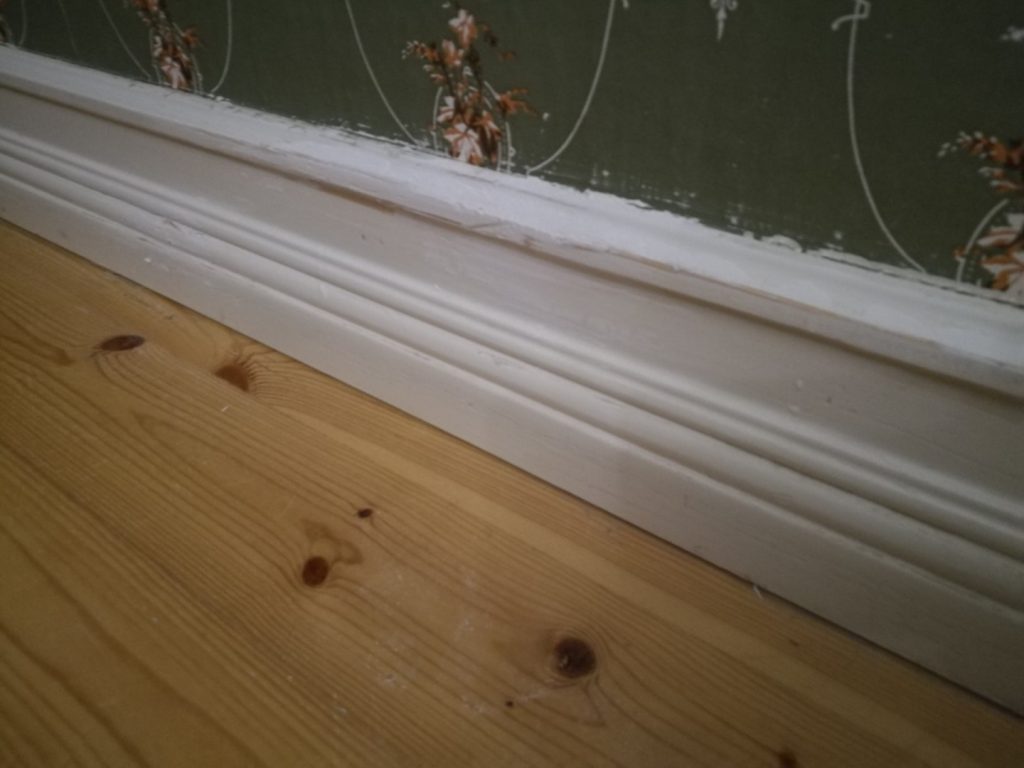
Finishing it.
At this stage of this
All in
Tips & Takeaways for fixing damaged wooden skirting boards
First: When fixing damaged wooden skirting boards use FRESH filling material! In the beginning, I used nearly one-year-old filler (which was stored properly). It was very hard to work with. So, I bought
Second: Don’t put too much filler in if the damaged area at once. Put it on in layers.
Third: Even